
When you decide to have fake grass for your lawn, you will pay a significant amount upfront since it will cost five to twelve dollars per square foot, and you will not only need a square foot of grass to cover the entire lawn. Aside from that, labor is part of the artificial grass cost because you will need experts to install them to ensure that they will last longer and not cause damage during the process. With that, installing fake grass yourself is another option if you are on a tight budget.
Here is the step by step DIY installation for artificial turf:
Step 1: Remove Existing Turf
To do this step, you will need to use a spade or turf cutter. You can start digging into the soil in about one and a half to two inches’ dip – be conscious of the edging since the grass should sit in about one-half inch above any perimeters in place.
Step 2: Lay Weed Membrane
By doing this, the weed membrane will serve as the barrier between the natural ground and the artificial turf so that no weeds can peek through it. When you shape the sheet, you will use a knife or a pair of turf scissors – remember to not skimp on the cutting.
Step 3: Sand and Tamp
When the weed membrane is already down over the soil, and the entire area is completely covered, you can now add a thin layer of sand or crushed stone in the same way of laying a brick paver patio. It ensures that the weight of the turf will take shape over the surface you want. This way, it can manage the water’s path to run through the ground.
Step 4: Level the Surface
This step is applicable if you are in a hilly area. After you lay the sand, you will drop another layer of sharp sand at about another half-inch of thickness. Once you have done that part, you will need to compact the sand using a tamper. After that, you will smooth the surface using a flat board.
Step 5: Align the Fake Grass
Then, you will finally lay the actual fake grass on the natural ground you prepared. You will start aligning the first strip of the grass corner or straight run on the yard. Always make sure to roll the grass out completely and butt up tight to the edge of the yard. Repeat the same step for each section.
Step 6: Shape to Fit Turf
For this step, make sure that the fake turf is completely rolled out and covered the area before you start cutting it to shape the grass. You will need a utility knife to cut it firm, straight edge.
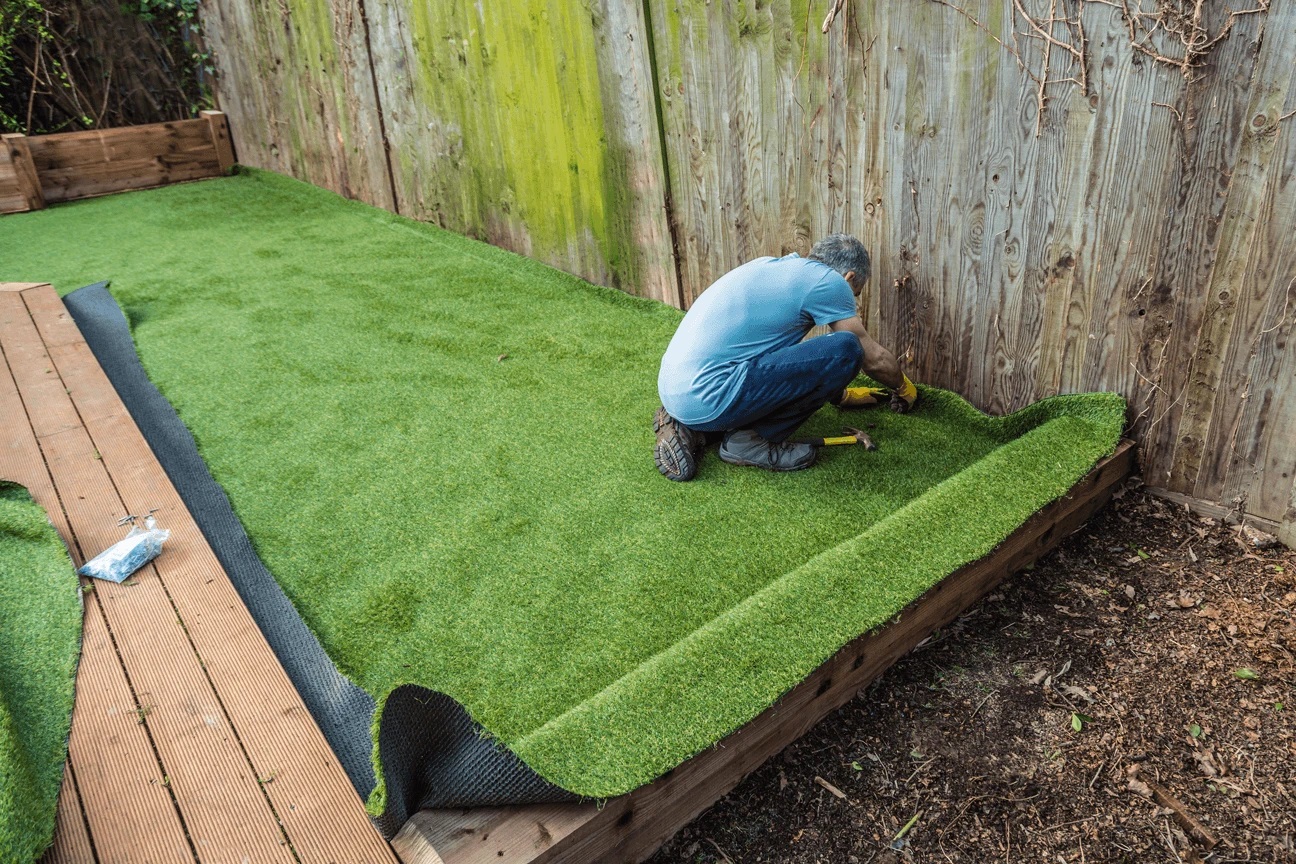
Step 7: Secure Turf with Anchor
The fake turf will stay in place with large nails anchored to hold on to it. To do this step, make sure that the grass is perfectly laid. Then, you will sink the nail below the surface of the grass face, not through it. Always check after dropping the pins to make sure that the turf is completely attached to the ground.
Step 8: Apply Silica Sand to Avoid Movement
As the turf is good, the last step you will do is to apply a layer of silica sand directly on the lawn surface to stabilize the grass and keep it from sliding all around.
These steps will serve as your guide in installing the artificial turf like a pro. However, if you can afford to pay for the overall expense for the synthetic grass installation, you can go on with that plan. Some companies offer a service for installing artificial turf in Melbourne.
At Easy Turf, you can assure that you will enjoy the beauty that fake grass brings to your lawn. You may contact us at 1800 EASY TURF (1800 327 988) or 0455 456 458.